How I'm Currently Running LLMs On My Laptop: A Guide
Imagine having access to a personal AI assistant that can help you absorb complex information, make connections between seemingly unrelated topics, and even offer creative suggestions. All running locally, on your own device.

Over the past few weeks, I've been using Large Language Models (LLMs) to enhance or augment various workflows. After some studying and experimenting, I found a setup that allows me to chat with an AI running locally on my laptop, with an experience similar to ChatGPT.
In this post we'll walk through installing Ollama to download and interface with models, setting up OpenWebUI with Docker to have a ChatGPT like experience, and configuring Tailscale to enable remote access.
Prerequisites
I am using MacOS 15 (Sequoia) with Apple Silicon with 16gb of ram. You should make sure you have adequate storage and ram capabilities to run your models. Ollama provide various model sizes to pull from.
Step 1: Installing Ollama
Thankfully, Ollama is rather easy to get up and running. Head over to the Ollama website and install the appropriate binary for your OS.
Once installed, run the following command in your terminal app of choice.
ollama pull llama3.2
Optionally, you can run the command "ollama run llama3.2" which will download the model AND begin a chat interface
This will install the default the llama3.2 3b parameter size. Check the ollama model list to find other llm's available for install.
To run the model, use the ollama run llama3.2 command.

Step 2: Setting Up OpenWebUI with Docker
The recommended way to install OpenWebUI is by using Docker. This is the way I used and what worked for me.
Assuming Docker is installed, simply run this command in your terminal:
docker run -d -p 3000:8080 --add-host=host.docker.internal:host-gateway -v open-webui:/app/backend/data --name open-webui --restart always ghcr.io/open-webui/open-webui:mainOnce installed head over to http://localhost:3000 to enter the interface.
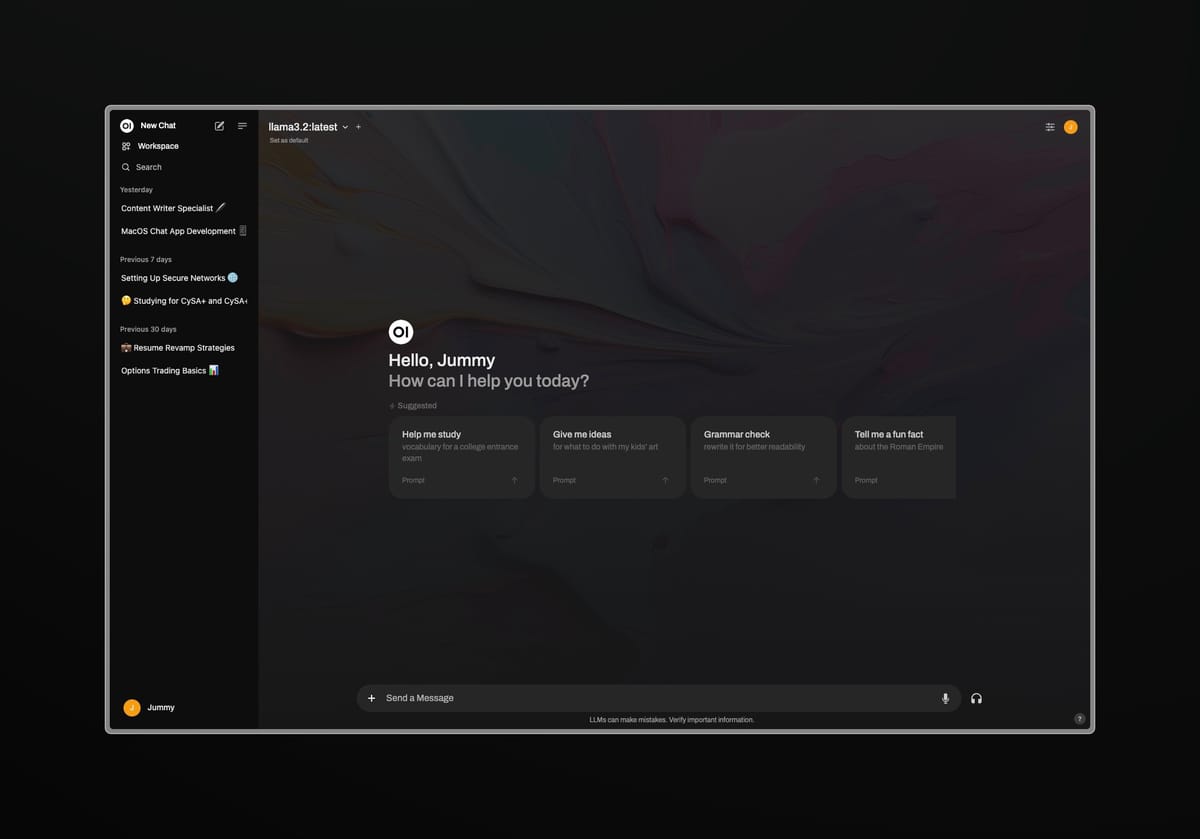
Success! Now you have a nice ChatGPT like UI to work with you local LLM’s.

I’ve been using this setup to help study for the CySA+ exam. Creating prompts and being able to have discourse with the AI seems like it’s helping me to absorb the information better. The AI is able to pull connections to topics that I might not have considered, allowing to me to dive deeper into my research. I believe overall, AI has the power to really supercharge my learning when used with a proper system.
[Optional] Step 3: Deploying Tailscale VPN to Remotely Access Your Assistants
What is Tailscale?
Tailscale is a mesh VPN service that allows you to create your own private Tailscale network (known as a tailnet), and makes it easy to connect to your devices, wherever they are.
Tailscale will allow us to remotely access the local host of the device we have Ollama and OpenWeUI set up on. This step is completely optional as best results come from having a device that’s always on. Tailscale is free to for personal use.
Head over to tailscale.com and press get started. It’ll have you sign up and install the Tailscale client.
Once installed it’ll prompt you to add your devices. You’ll want to add the host device for Ollama as well as the device you want to use to access remotely. For mobile devices, download the Tailscale app.
Now, on your remote device, copy the IPv4 address of the host device from Tailscale and paste it into your browser with port 3000 (or whichever port docker has openwebui facing for you) like so: [YourHostIPv4]:3000.
Voila, remote access to your AI environment. Now that you have a basic setup in place, experiment with different models, prompts, and configurations to see what works best for you.

